I thought it was time for some upgrades.
My buddy, Kevin, posted a deal that I couldn’t miss (8GB memories for $55, yet now it’s $50. dammit. ) Shortly after announcing that I pulled the trigger and installed the new RAM, some of my friends have asked about the process of installation. To my surprise, it’s actually much simpler than expected, thanks to the tutorials Apple’s posted online. I usually would leave it to the professionals to handle any hardware transplants because I’m too afraid to mess up, but this ain’t one of them. It’ll take you about 10 minutes. max.
Anyway, here’s what went down: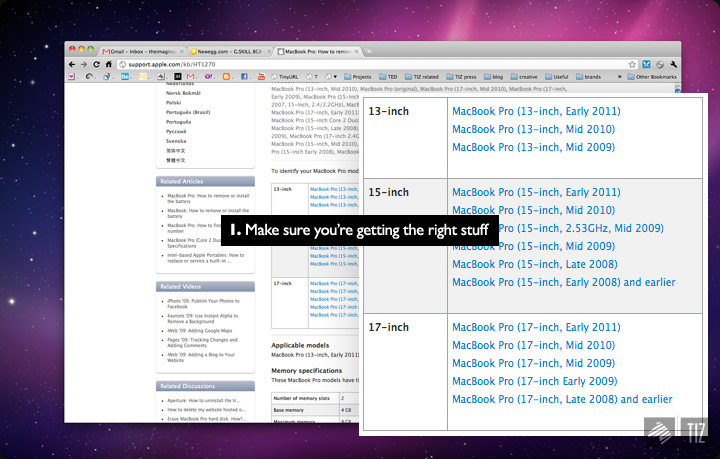
↑ Step number 1 – Make sure your upgrades are compatible with your machine. Apple’s been putting new laptops every 6 months, each one exceeding the last. Though they’re all named the same, the internals may be differ. Be certain that you’re eyeing the right gear before paying for them. Here’s a handy guide for MacBook Pro RAMs.
Stuff you need for the upgrade: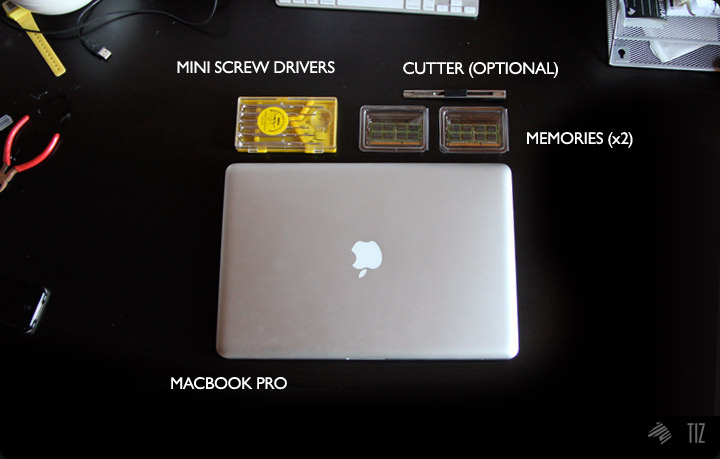
↑ Aside for the self-explanatory things, you really just need a small screw driver to get things done.

↑ Step 2 – Shut off and disconnect EVERYTHING – and leave it to cool for about 10 minutes. Don’t want to get burnt while plugging in your new RAMs.
It’s been months since I last removed the protective case, and man, I almost forgot how beautiful it is. Big ups to Jonathan Ive.
↑ Slick unibody.
Hidden indicator.
Moving on, step 3: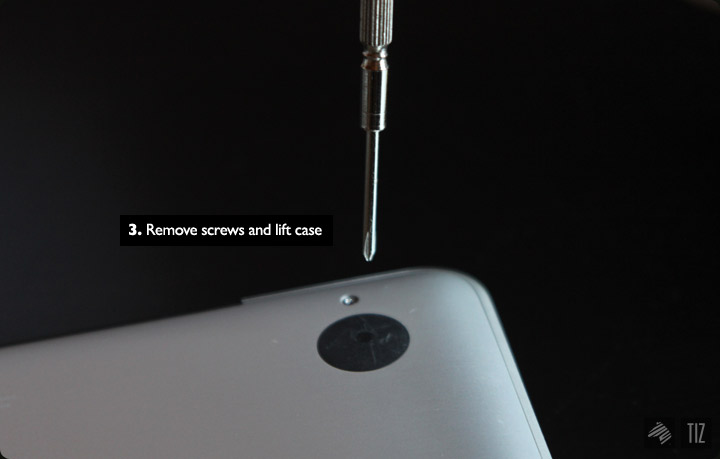
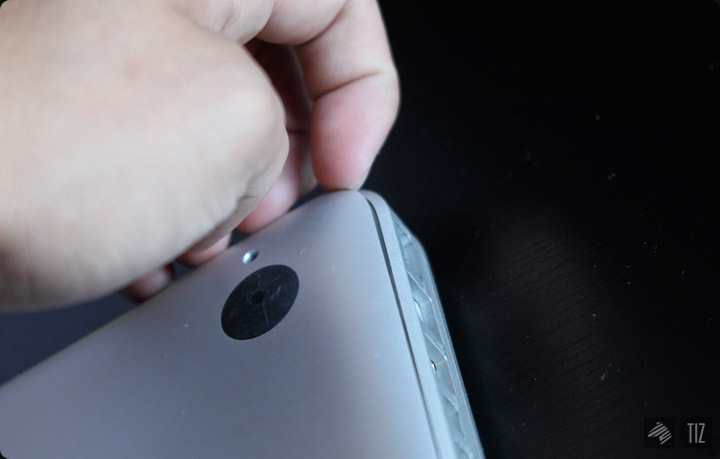
↑ Remove screws and case.
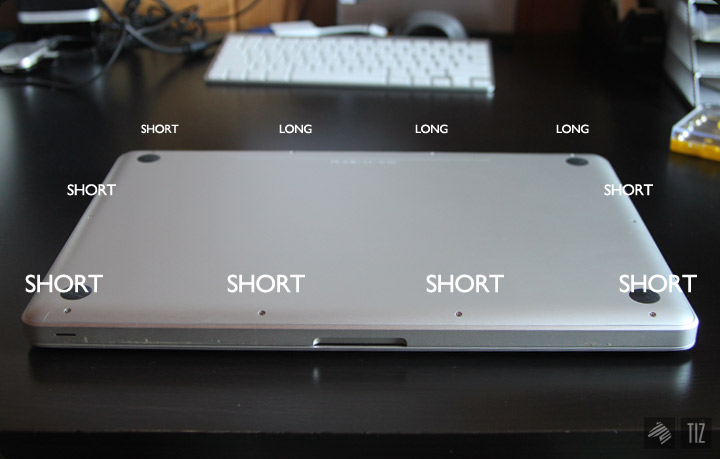
One thing to note:
↑ There are 2 different types of screws – long and short. The following picture will show you where each of them’s placed.
Find a container to place them – if misplaced, they’ll be harder to find than your last set of keys.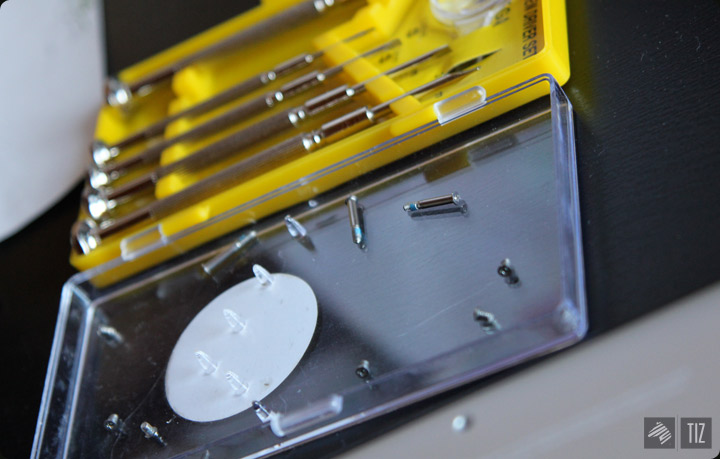
Macbook Pro’s bottom.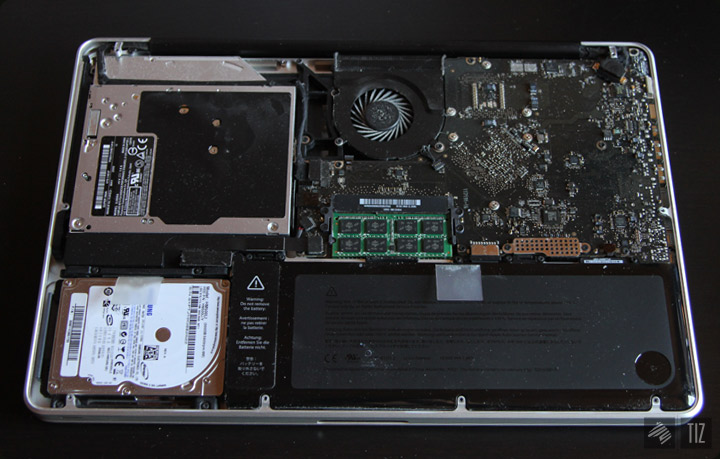
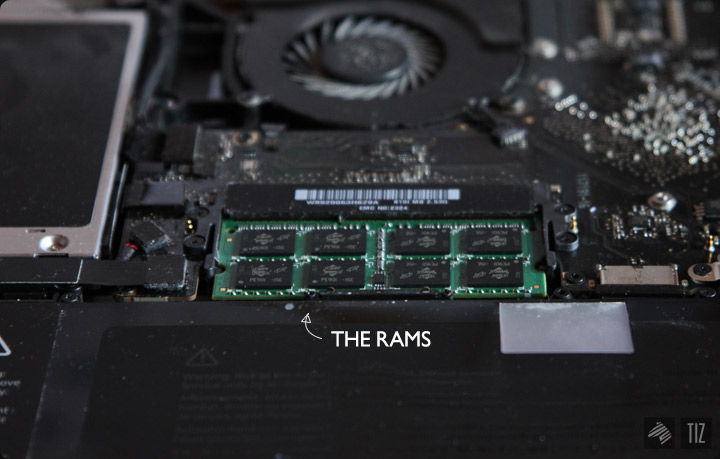
↑ The green thing in the middle’s what we’re gana work on.
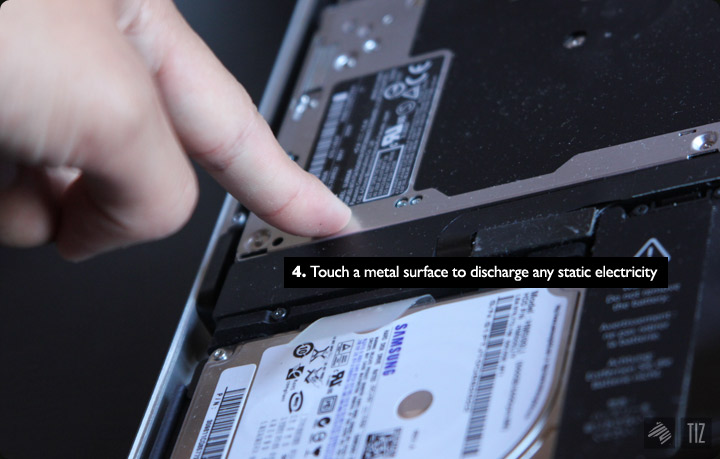
↑ Necessary step.
5.) Pop up the memory (yup, they do pop up) one at a time: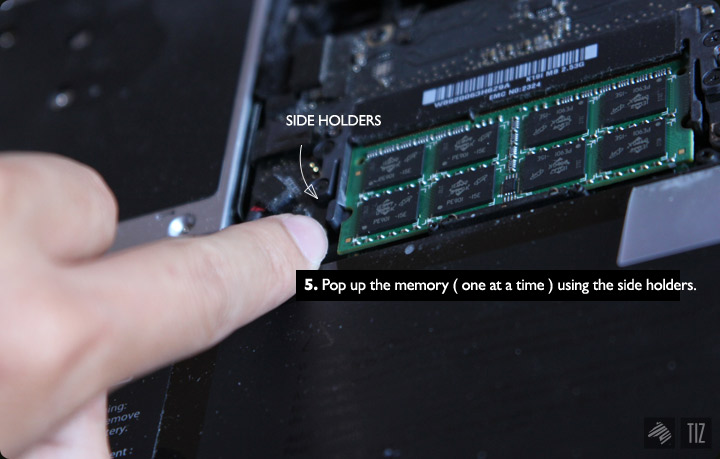
These are the side modules. Bring them outwards to release the RAM. Once released, it’ll pop up to an angled position.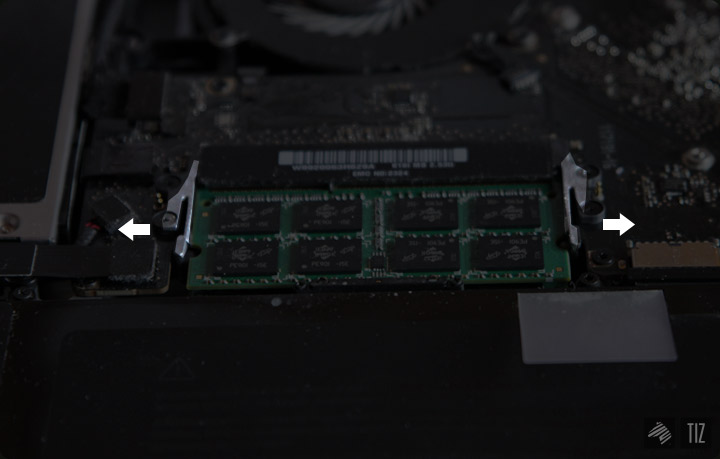
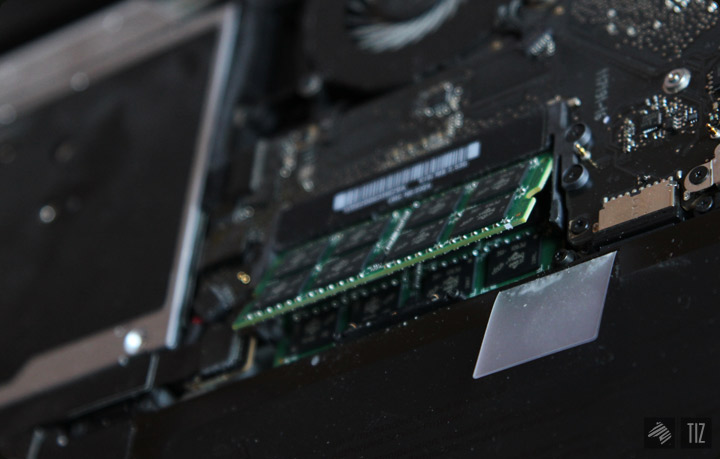
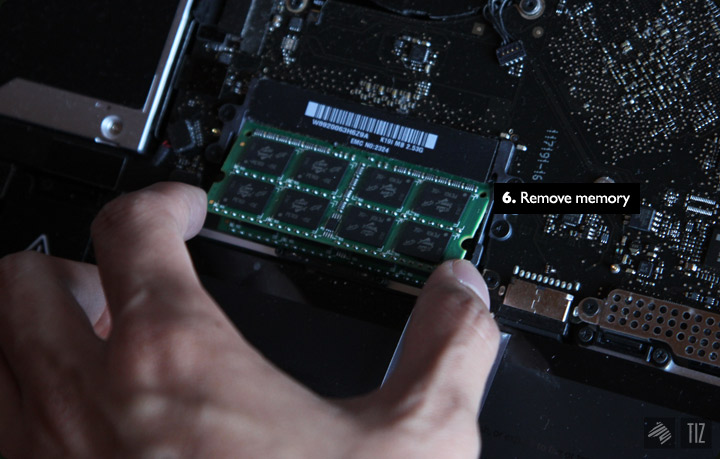
↑ Grab a hold on the edges and carefully pull the memory out.
Now do the same for the second.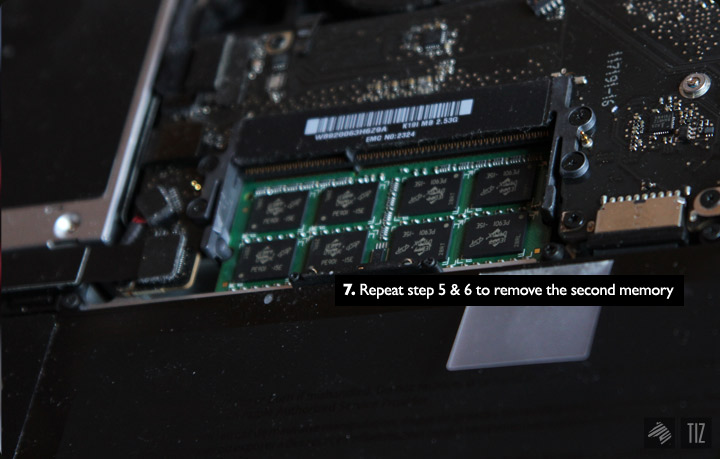
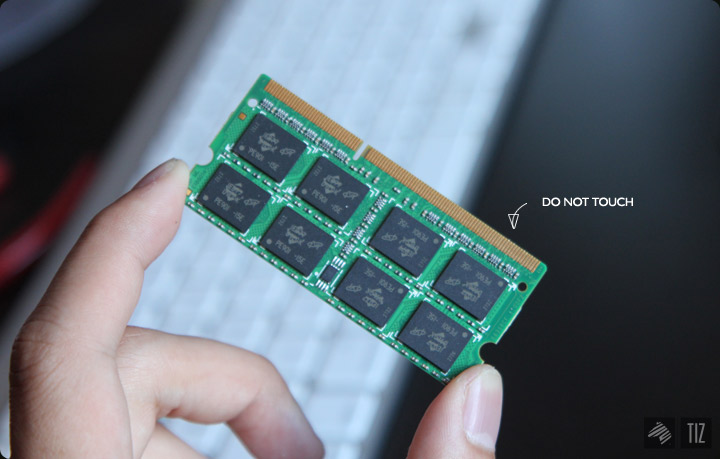
Sidenote: It’s important to use both of the same size RAM. It’ll be more stable than say, a 4GB x 2GB mix..etc.
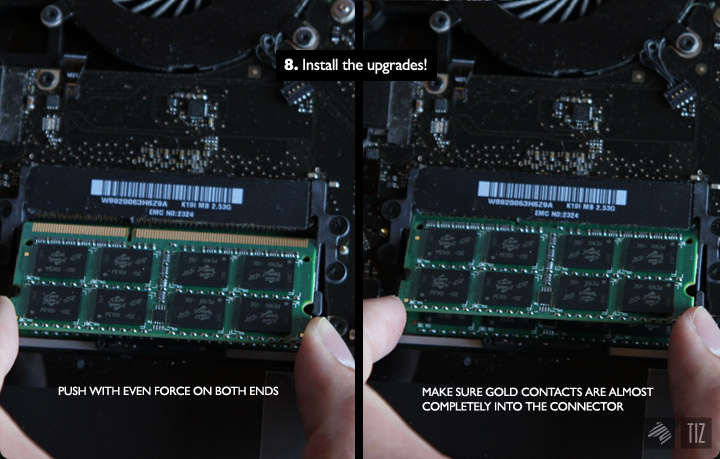
↑ Crucial moment: pushing in the RAM with the lower one first – even force. Install it with an angle. Push down to original place to finish. You’d hear a click when the side modules is properly holding the RAM in place.
Seal.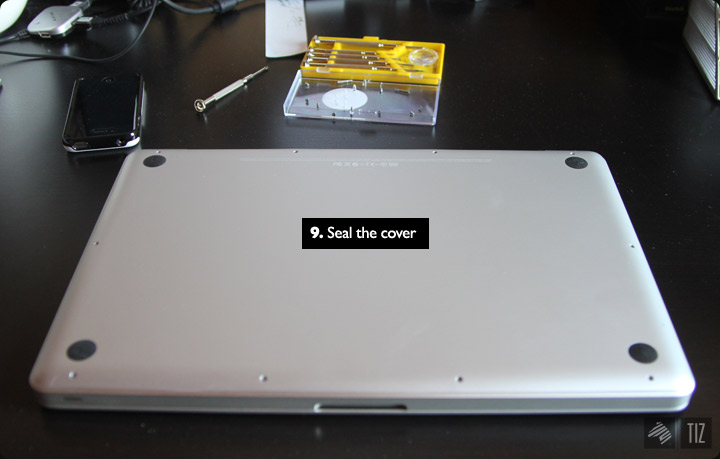
..and finally:

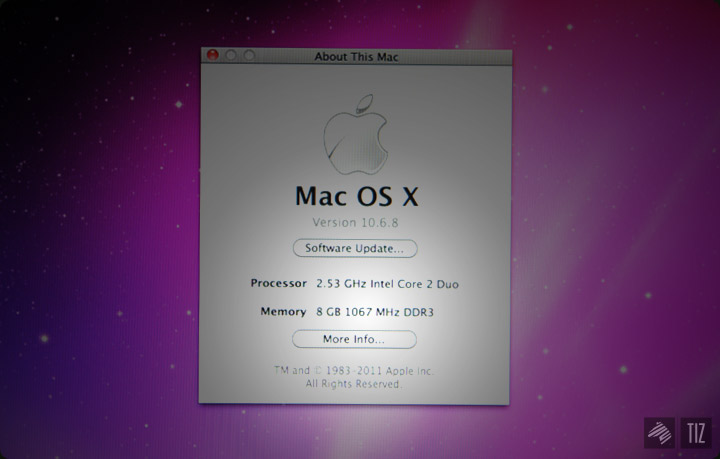

That wasn’t too bad, eh.
’til my next upgrade!
-Benson|| Twitter || the movement|| The Imaginary Zebra website || Shop of Imagination ||