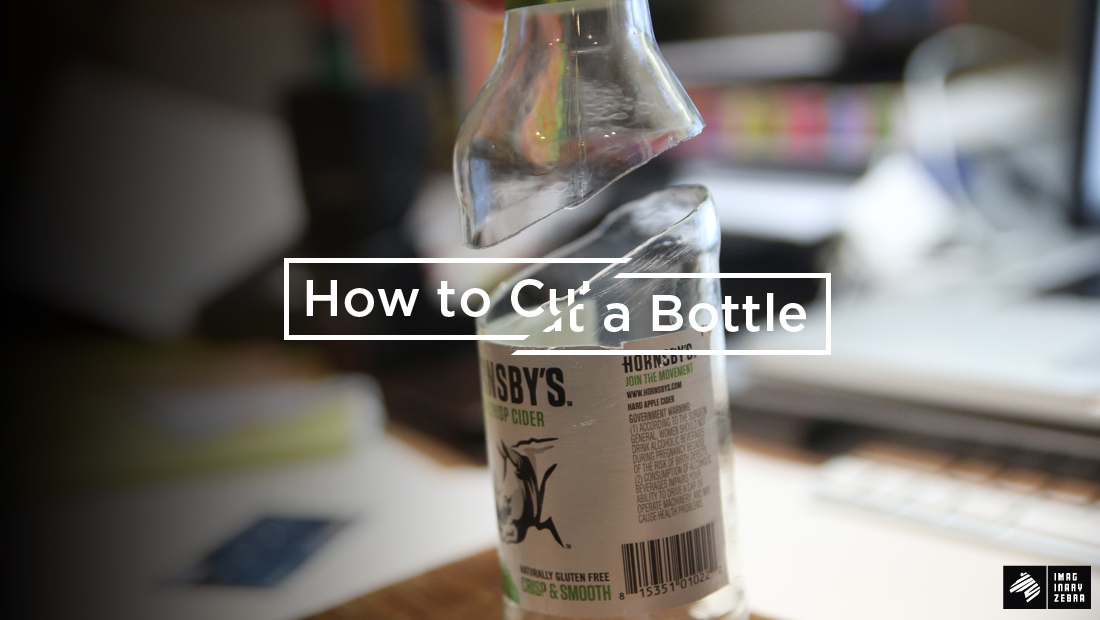
It started with the following: Look how beautiful the results are. The process seem fairly easy. Wow, what a wonderful afternoon project. SIKE!! I wouldn’t be so optimistic. It took me more than a dozen tries before I get something just semi close to what appears on the right of that project brief. And just a heads up, I used an entirely different method.
Disclaimer: It might work as described above, if the weather, temperature, timing, rotation speed, and feng shui are just right. It wasn’t the case for me, personally.
Now, here’s what we tried and what you’ll need:

We just need to dip the yarn into liquids that are flammable. 
Then, wrapped the soaked yarn around where you’d like the bottle cut. 
Keep your distance from the soon-to-be burning area. 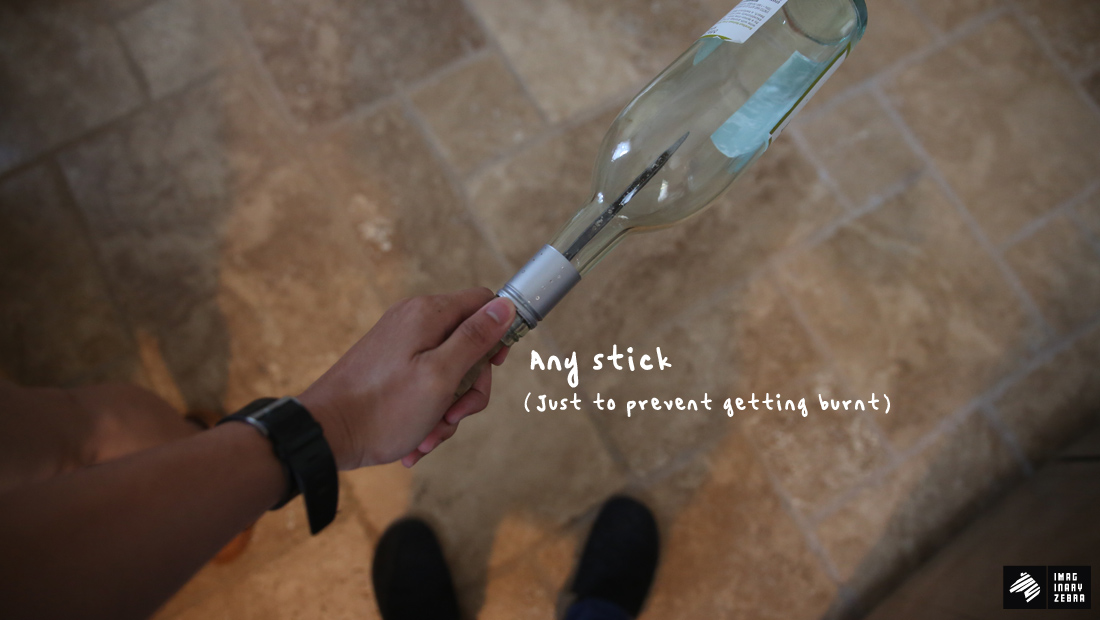
Light it up:
Next:

Not a single f*ck was given by the wine bottle, so I had to try something else.
First, I added ice to the water. Thought the bottle didn’t break into two was caused by low contrast between the two states. (Turnout to be unnecessary.)

Now trying beer bottles.

Burn! 
Dip!
Wait..am I really..
Yes! The very first cut. Though, the cut was totally different from what I’ve imagined, but progress is progress. 
For a cleaner cut, we tried a thinner thread, hoping the flame would be contained and create a more refined breakage. 

…found out that it was too thin to even burn across the bottle. 
Then, we tried a couple of other methods: Spinning the bottle as the flame runs across the bottle. Using different types of threads. Extending and shortening the time of the burn. and NONE of them worked. 

The conclusion is this: It was really really difficult to make a clean cut using yarn and flame.

Not giving up, we took in some suggestions from the supporters out there and did some more research:
And the solution is this:  A glass cutter! $6 via Home Depot. They’ve made circular ones specifically for bottles, but they at the price range of $45 (ef that). We bought this and decided to cut bottles the right way.
Step #1, I traced the bottle of where I’d like cut with a sharpie. 
Then, I got too busy cutting the bottle that I forgot to snap a picture of a crucial step.
When you use the glass cutter, don’t use it to cut through the glass. You only use the cutter to trace across the bottle, making a minute line on the surface of the bottle. Do it slowly and steadily. Due to the round surface of the bottle, it’s easy to slip and create deviating lines from the original path. You don’t want that. Just trace the sharpie line smoothly, it’d be where the bottle would snap later.
Now, I was advised to use hot water instead of flame. The heat from boiling water is enough to stress and break the bottle when contacting cold water right after. 
First try using the new method. Boss.

Daniel gave it a try to. It was almost perfect. 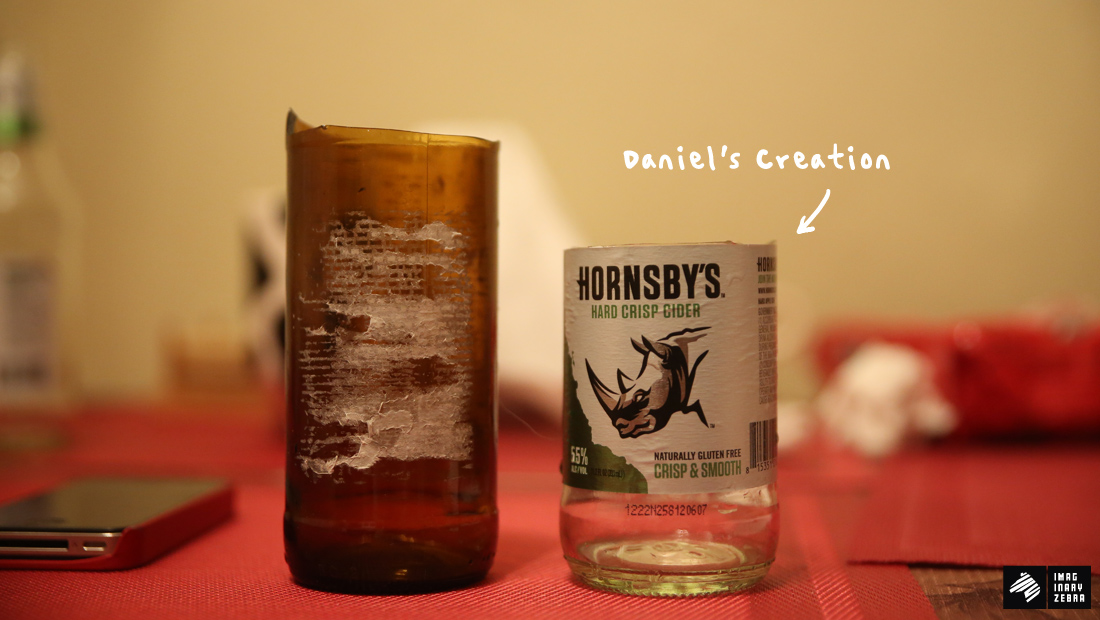
I did a few more tries. 
Then, I wanted to try something fancy: 
BAM! This is as smooth as it went before I call it day. 
The line may not be as smooth as planned, but the cut was absolutely clean. When I put the two parts together, the seal is tight enough to keep running water within the bottle without a leak. It was awesome. 
I’ll be posting ways I used the cut bottles in the near future.
’til then,
-B)


you’re really awesome, did you know that?
Thanks for coming by, that makes you even more awesome!
I’ve done it before with hemp cord (one thing I could find) put it in a bit of germ x for the alcohol for less then a minute, wrapped the bottle with it, lit on fire, waited for fire to go out, then ran cold water on it. Easy cut every time